

How to Sanitize Your RV Fresh Water Tank
Posted by RVCampersUSA on Nov 20th 2025
How to Sanitize Your RV Fresh Water Tank (The Fresh Water System Reset)
Updated November 2025 for accuracy and clarity.
Your RV’s fresh water system sees more mystery campground water in a single season than most homes see in a decade. Here’s the safe, science-based way to sanitize your fresh water tank, what happens if you skip it, and how to keep water clean without damaging your rig.
Hooking up to a new campground spigot is always a bit of a mystery. The water might look crystal clear, or it might come out cloudy, smell strange, or leave rusty streaks in your sink by morning. If you’re unsure about the pressure side of things too, see: Do I Need an RV Water Pressure Regulator?
Now imagine all that running through your RV’s fresh water tank and plumbing, then sitting in warm weather. That’s how you get biofilm, weird tastes, microbial buildup, and “I don’t trust this water” moments.
The good news? You don’t need to be a water chemist to keep things clean. With a simple routine we call the Fresh Water System Reset, you can:
- Break down biofilm and reduce microbial buildup safely
- Flush out sediment, rust, and stagnant water
- Reset your tank after questionable campground hookups
- Use potable-safe methods that won’t harm your RV
This guide walks you through the science, the step-by-step process, and the photo-style illustrations most RV guides skip.
For a big-picture look at water quality issues, pair this with: Is Your RV Fresh Water Safe? (The Campground Contamination Map)
Why Sanitizing Your RV Fresh Water Tank Matters
Every park uses different plumbing, different sources, and different chlorine levels. Even “safe” water can leave behind:
- Biofilm — a slimy layer of microbes that clings to surfaces
- Rust flakes and sediment from older campground pipes
- Iron and manganese staining on fixtures and tank walls
- Stagnant pockets in low-use lines like outside showers
Sanitizing wipes the slate clean so you aren’t inheriting the water history of the last ten campgrounds.
System resets are critical in any RV plumbing environment. While fresh water sanitation restores potable safety, holding tanks operate under very different and highly variable conditions. We explore how treatment mechanisms respond to temperature shifts, hydration changes, and dump-cycle resets in our RV holding tank treatment scientific comparison whitepaper .
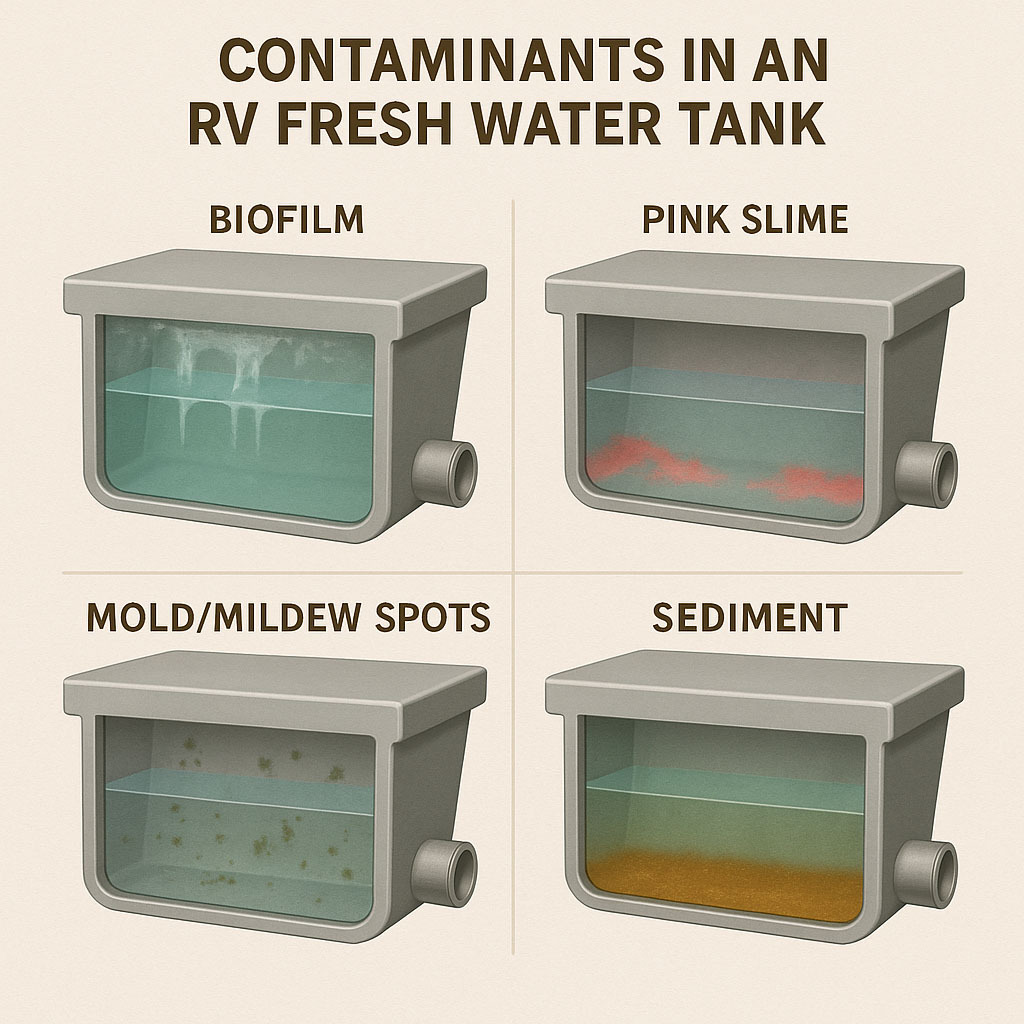
What Happens If You Don’t Sanitize?
Over time, you may start to see (and smell):
- Biofilm – clear/white/gray slime in low spots and walls
- Pink slime – reddish patches from Serratia bacteria
- Mold & mildew – green or black specks in corners
- Sediment buildup – sand, silt, and rust flakes
- Iron/manganese streaks – orange or black staining
- Hard water scale – chalky calcium deposits
- Cloudy stagnant water – hazy upper layer that smells off
Most RVers first notice a problem when the water tastes strange, smells plastic-y, or leaves a film on dishes. Sanitizing resets the system and clears out buildup you can’t see.
How Often Should You Sanitize?
- Weekend / occasional campers: At the start and end of the season, or after 4+ weeks of sitting.
- Full-timers: Every 60–90 days.
- Boondockers: After any questionable source (well, ranch, private land).
- Used RV purchase: Immediately.
- Any odd smell or taste: Sanitize before troubleshooting anything else.
Simple rule: sanitize after downtime, weird water, or weird taste.
The Fresh Water System Reset (Step-by-Step)
Follow these safe, accurate steps based on RV manufacturer and potable-water sanitizing guidelines.
Step 1: Turn Off Your Water Heater
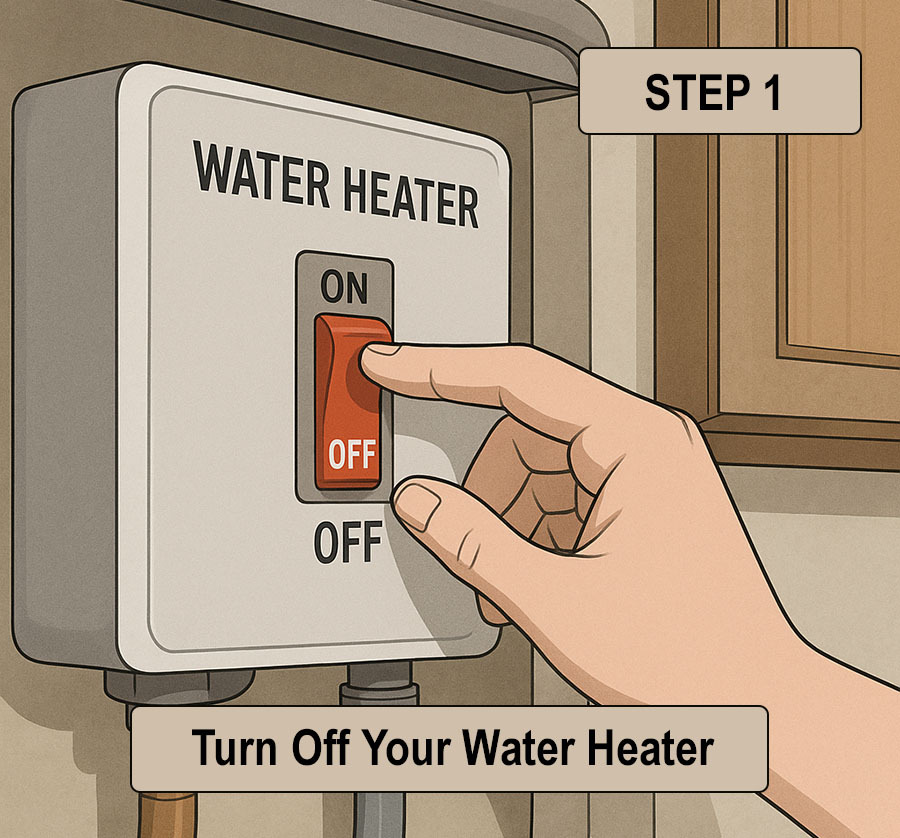
If your RV has a water heater bypass valve, flip it now. This prevents bleach solution from entering the heater tank.
Step 2: Drain the Fresh Water Tank & Low-Point Drains

Crawl under your RV and locate:
- Fresh tank drain — usually a larger tube or valve
- Hot/cold low-point drains — two small PEX tubes
Open them all to empty the system. Opening a faucet inside helps air enter and speeds draining.
Step 3: Mix a Diluted Sanitizing Solution
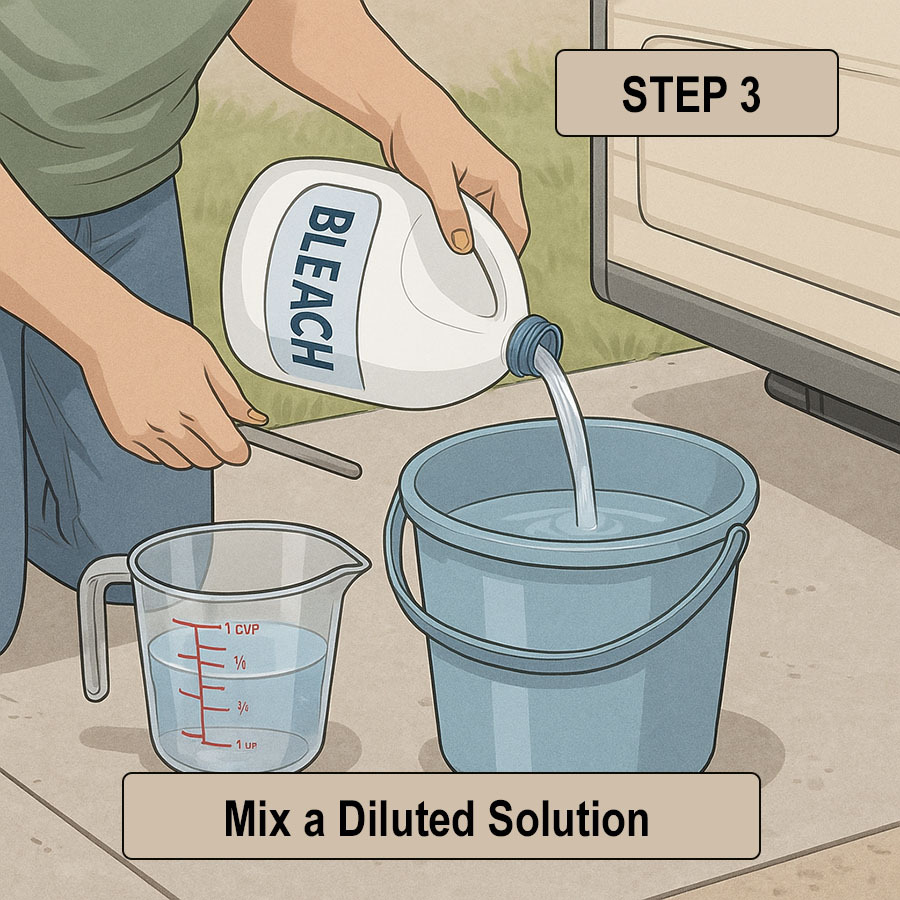
Use ¼ cup of unscented household bleach per 15 gallons of tank capacity. Dilute it in a bucket of clean water — never pour undiluted bleach directly into your tank.
Wait… Are We Really Telling You to Add Bleach?
If you’ve read our waste-tank guides, you know we always say: “Never use bleach in your tanks.”
But the fresh water system plays by different rules. RV manufacturers and the CDC explicitly recommend diluted bleach as the safest way to sanitize potable-water systems.
So yes — this is the only time you’ll ever hear us say: “Add the bleach.” (And trust us… it feels just as weird for us as it does for you.)
Step 4: Add the Solution to the Fresh Water Fill

Close the drains from Step 2, then pour the diluted solution into your fresh water fill port using a funnel.
Step 5: Fill the Fresh Water Tank Completely
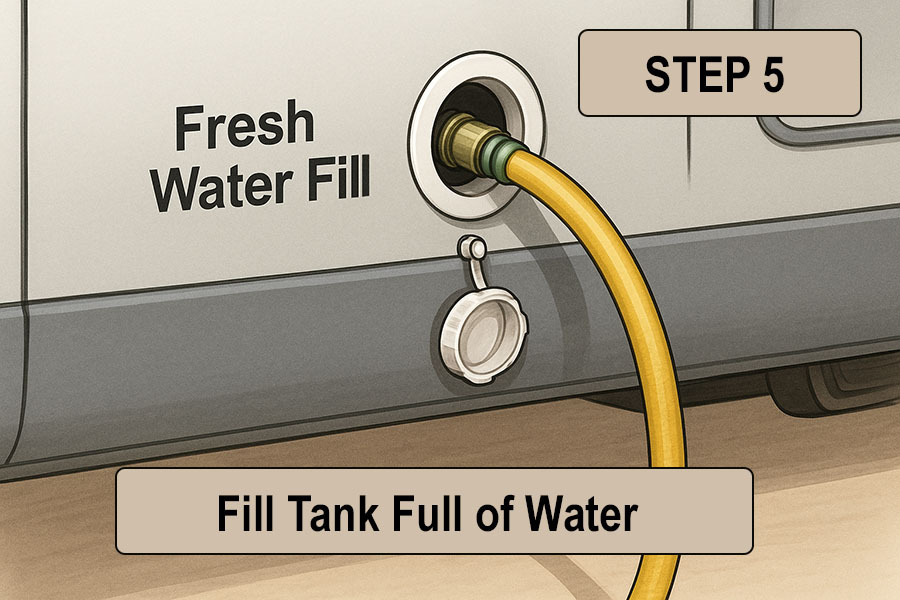
Need a refresher on this step? See: How to Fill Your RV’s Fresh Water Tank.
Use your potable water hose to fill the tank fully. This distributes the sanitizing solution to every interior surface.
Step 6: Run Faucets Until You Smell the Solution
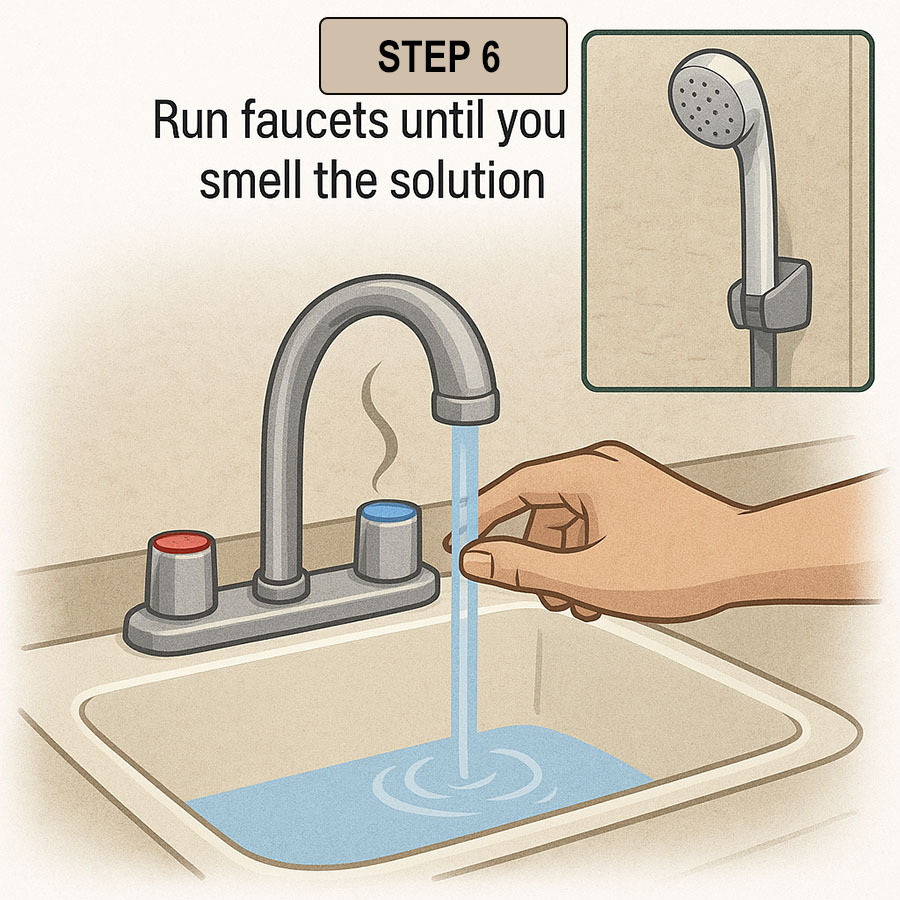
Turn on cold faucets until you detect a faint bleach odor. Repeat on the hot side if sanitizing those lines too. This pulls solution through every branch of your plumbing.
Step 7: Let It Sit for 4–12 Hours
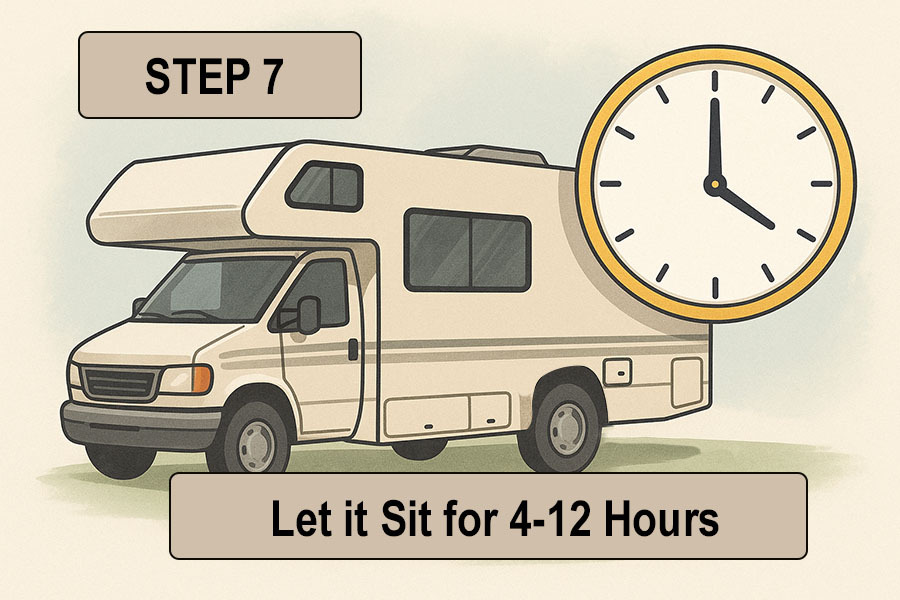
Most situations require 4–8 hours. Heavy contamination may benefit from up to 12 hours.
Step 8: Drain the System Again
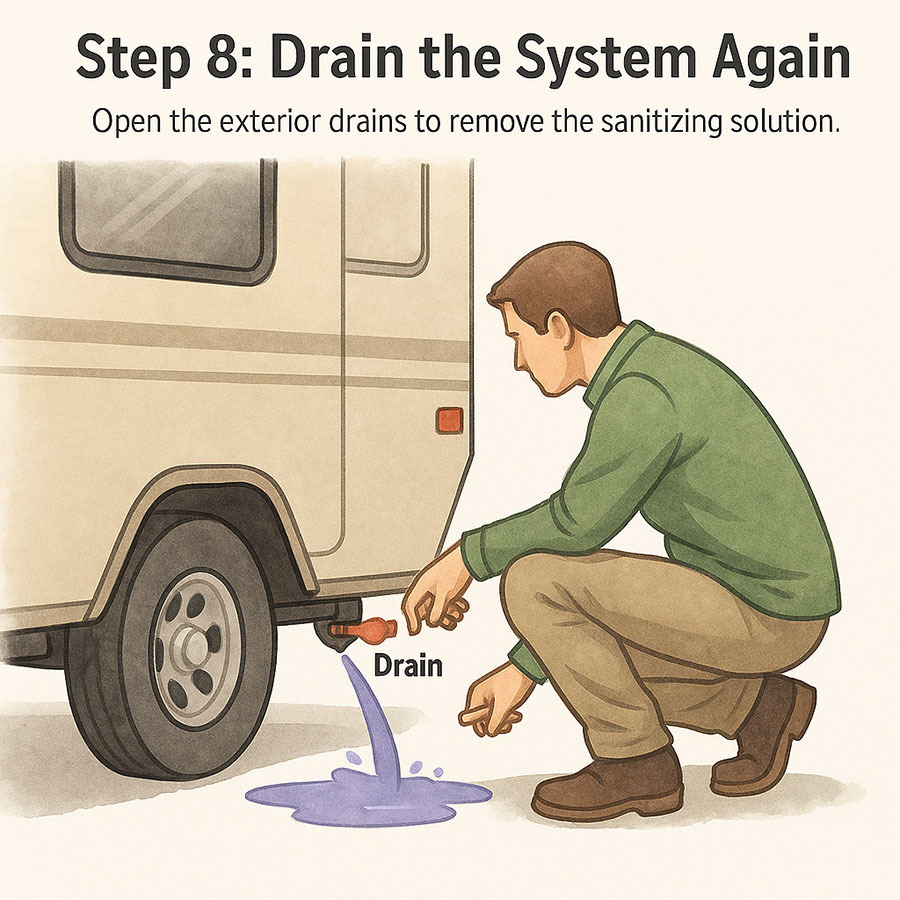
Drain the system exactly like Step 2 — through the tank drain and low-point drains.
Step 9: Refill & Flush Until Odor Is Gone
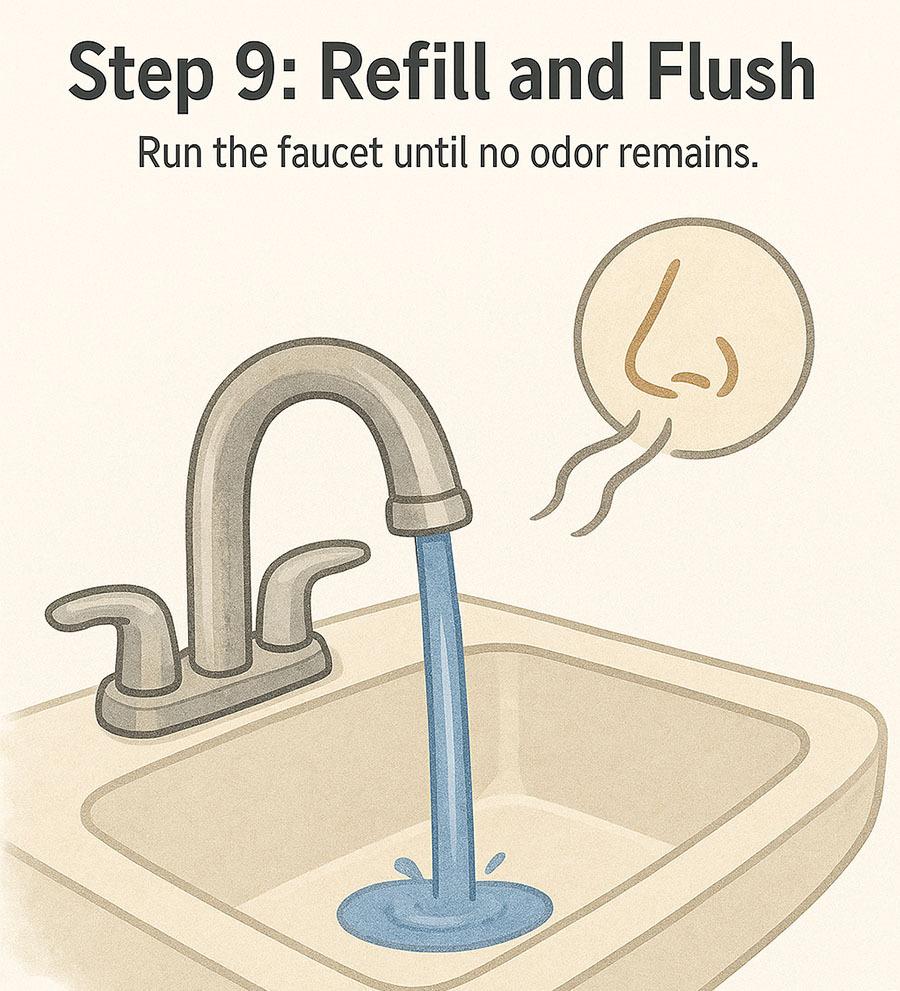
Refill the tank and run each faucet until no chlorine smell remains. You may need to flush twice on large systems.
Step 10 (Optional): Do a Vinegar Rinse
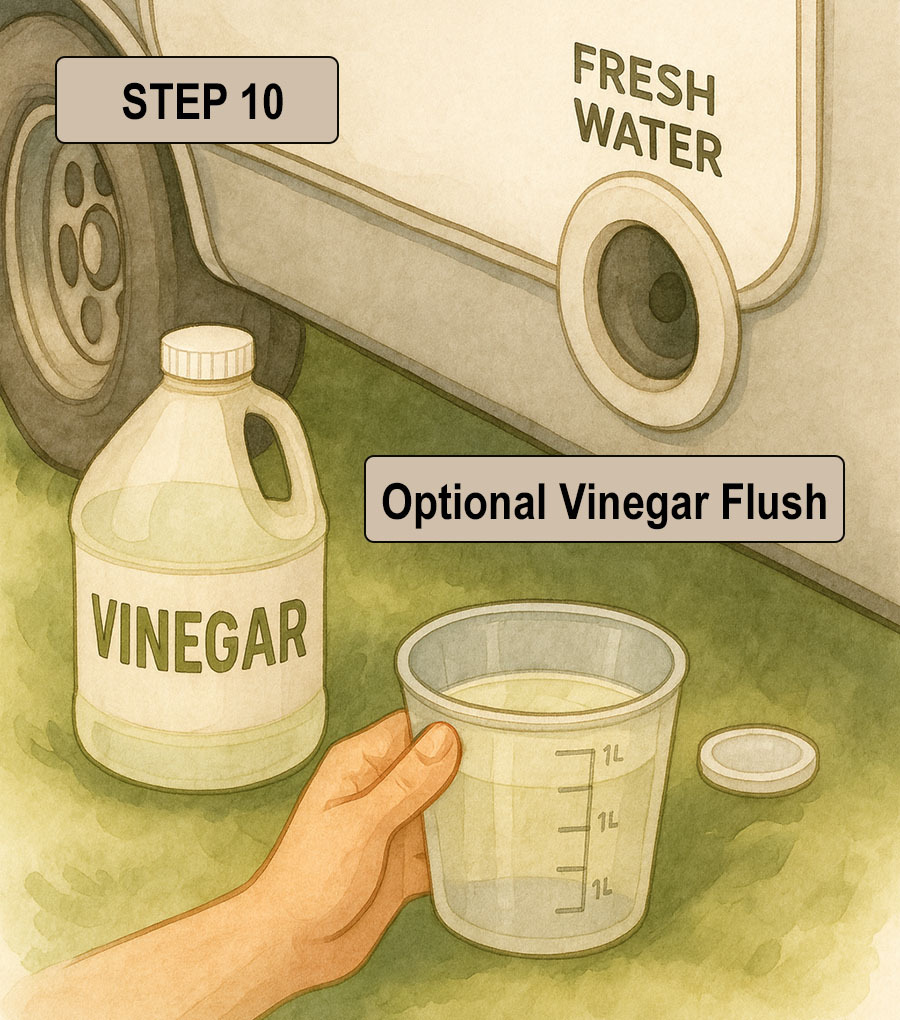
Add 1–2 cups of white vinegar to a partial tank, circulate it, let sit 30 minutes, then flush with fresh water.
What If Your RV Doesn’t Have a Gravity Fill Port?

Many newer RVs do not have the large “Fresh Water Fill” port on the exterior. Instead, they use a pressurized fresh water system, which means you cannot pour a sanitizing solution into the tank with a funnel.
✔ Use Your RV’s Winterizing Siphon (Most Common Method)
If your RV has a winterizing hose and valve near the water pump, you can use it to pull the pre-diluted sanitizing solution into the plumbing:
- Mix the bleach solution in a clean container.
- Turn the winterizing valve to “Winterize.”
- Place the siphon hose into the diluted solution.
- Turn on the water pump — it will draw the solution in.
- Switch the valve back to normal and fill the tank through the city water connection.
This process happens inside the RV (usually under the sink), not at an exterior fill port.
✔ Or Use a Pump Converter / Camco Winterizing Kit
These kits allow your water pump to draw from a jug. Just place the pickup tube into your diluted solution, turn on the pump, and the system will pull the mixture in automatically.
Important: Never siphon undiluted bleach through your water pump. Always dilute it in a bucket before adding it to the system.
Safe Bleach Ratios for RV Fresh Water Tanks
Use 1/4 cup of unscented household bleach per 15 gallons of tank capacity.
| Tank Size | Bleach Needed |
|---|---|
| 30 gallons | ½ cup |
| 45 gallons | ¾ cup |
| 60 gallons | 1 cup |
| 75 gallons | 1¼ cups |
| 90 gallons | 1½ cups |
Always use plain, unscented household bleach (5–6% sodium hypochlorite). Never use splashless, scented, or gel bleach.
Potable-Safe Sanitizing Products (Bleach-Free Options)
If you prefer a bleach-free option, these are safe for RV potable water systems:
✔ Thetford Fresh Water Tank Sanitizer (Two-Part System)
EPA-registered sanitizer designed for RV and marine fresh water tanks. Effective without straight bleach.
✔ Blu Technology BLEACHFREE Liquid RV Sanitizer
NSF-certified sanitizer that uses chlorine dioxide at low concentrations with less aftertaste.
Both are great alternatives, but the bleach method remains:
- The most affordable
- Manufacturer-recommended
- Safe when used correctly
What NOT to Use in Your Fresh Water System
The fresh water side of your RV is not the place for improvising. Avoid:
- No holding tank treatments (any brand)
- No heavy-duty cleaners meant for sewer systems
- No vinegar-only “sanitizing.”
Vinegar is great for dissolving mineral scale and is safe as a light rinse after sanitizing — but it does not disinfect a fresh water system. Do not rely on vinegar as your primary sanitizing method. - No scented or splashless bleaches
- No undiluted bleach
Fresh water systems must only see potable-safe products or properly diluted bleach.These guidelines apply only to fresh water (drinking water) systems and should never be used in gray or black tanks.
Do I Need to Sanitize Today?
Sanitize your fresh water system if:
- It has sat unused for more than 4 weeks
- You recently used a questionable source
- The water tastes or smells odd
- You see slime or discoloration in fixtures
- You bought a used RV with unknown history
Fresh Water Tank Sanitizing FAQs
Can sanitizing remove weird tastes?
Often, yes — especially if caused by biofilm or stagnant water. If taste issues persist, pair sanitizing with filtration. For more, see: Do I Need an RV Water Filter for Fresh Water Hookups?
Can I use vinegar instead of bleach?
Vinegar helps dissolve mineral scale and neutralize mild odors, but it is not a disinfectant. Use bleach (or a potable-safe sanitizer) for actual sanitizing.
Do I still need to sanitize if I always use a water filter?
Yes. Filters improve taste and remove sediment, but they don’t sanitize what grows inside the tank or lines. Filters = first line of defense. Sanitizing = deep clean.
Is bleach safe for my RV plumbing?
Yes — at the recommended dilution (¼ cup per 15 gallons). Stronger solutions may damage seals.
Can I drive with the sanitizing solution in the tank?
Yes. Many RVers drive between stops to help slosh the solution around. Just ensure you meet the full contact time before draining.
Sanitizing your fresh water tank is one of the simplest ways to keep your RV’s plumbing clean, safe, and great-tasting. With the Fresh Water System Reset, a safe sanitizing agent, and the right routine, your water will stay trustworthy trip after trip.
Pair this guide with: