How to Deep Clean an RV Black Tank (2025 Guide) | RV Holding Tank Reset & Maintenance Tips
Posted by Happy Campers Store on Nov 10th 2025
RV Holding Tank Reset (2025 Guide): How to Deep Clean Your RV Black Tank the Right Way
How to Deep Clean Your RV Black Tank (and Why a Total Holding Tank Reset Works Best)
Updated for 2025 — the proven, science-backed method for deep cleaning and resetting your RV holding tanks.
TL;DR — Deep-Clean Your RV Black Tank the Right Way
The best method to deep clean an RV black tank is to fill it with hot water and a buildup-stripping cleaner like Happy Campers Extreme Cleaner, let it soak 12–24 hours, drive or agitate to loosen residue, then flush thoroughly. Follow with Happy Campers Holding Tank Treatment for odor control and maintenance.
- ✅ Soak with cleaner → loosen hardened waste & biofilm
- ✅ Agitate while driving or use a rinse wand/backflusher
- ✅ Rinse until clear → restore sensors & eliminate odor
Perform a total RV holding-tank reset instead of multiple partial cleanings: fill the tank with hot water, add a buildup-stripping cleaner like Happy Campers Extreme Cleaner, soak overnight, and rinse thoroughly. This dissolves residue (grease, soap film, biofilm, and mineral-locked layers) that regular treatments miss.
Troubleshoot Your RV Holding Tank Issues
If any of these sound familiar, you likely need an RV holding tank reset.
Why does my RV black tank smell even after dumping?
Why do my RV tank sensors always read full?
Why is my gray tank water brown when I flush?
Do ice cubes or dish soap really clean tanks?
Are enzyme treatments enough?
Infographic: How to Dump Your RV Tanks + Troubleshooting Black Tank Problems
A one-page visual you can save or share. It covers step-by-step dumping, secure connections, and a quick tank problem diagnostic plus a sure-fire total tank reset.
Why a True RV Holding Tank Reset Beats “Ordinary Cleaning”
A holding tank reset returns tanks to a like-new baseline by (1) loosening residue with the right chemistry, (2) allowing adequate soak time so solution contacts walls and probes, and (3) performing a thorough rinse to wash loosened debris completely out.
The Science of Waste Buildup in RV Holding Tanks
Liquids exit; residue remains. Over time, solids, toilet paper, grease, soap residues, biofilm, and mineral-locked films create layers on tank walls and sensors. These layers trap odors, slow drains, and foul probes. Gray tanks often look dirtier during a reset because they accumulate grease + soap scum and are rinsed less frequently.
The Science of Odor Control in RV Holding Tanks
Odor inside RV tanks comes from anaerobic bacteria breaking down waste in low-oxygen conditions and releasing gases like hydrogen sulfide (H₂S) and ammonia. Masking these smells with perfume doesn’t work long-term—you have to stop the chemistry that creates them.
That’s where mineral-based odor control differs from enzyme or fragrance treatments. Instead of feeding bacteria or covering smells, Happy Campers’ minerals neutralize the odor molecules on contact and create a balanced environment where odor-causing bacteria can’t thrive.
Learn the full breakdown of odor chemistry, sulfur gas formation, and how minerals outperform enzyme “odor-eaters” in The Science of Odor Control for RV Black Tanks (2025 Guide).
Why “Super Liquefaction” Doesn’t Mean a Clean Tank
Many enzyme and bacterial products promise “super liquefaction”—a quick breakdown of solids into a brown slurry. It sounds good, but in reality, this only helps waste exit faster; it doesn’t clean what’s left behind on the walls, probes, and outlets.
Liquefaction may even make sensors worse if residue redeposits further up the tank. A true clean requires dissolving and lifting the films and bio-layers that enzymes can’t touch—precisely what a full tank reset does.
Read a full breakdown of the enzyme marketing hype vs. real tank science in Super Liquefaction: Enzyme Tank Treatments, Marketing Hype, and Real Waste Science.
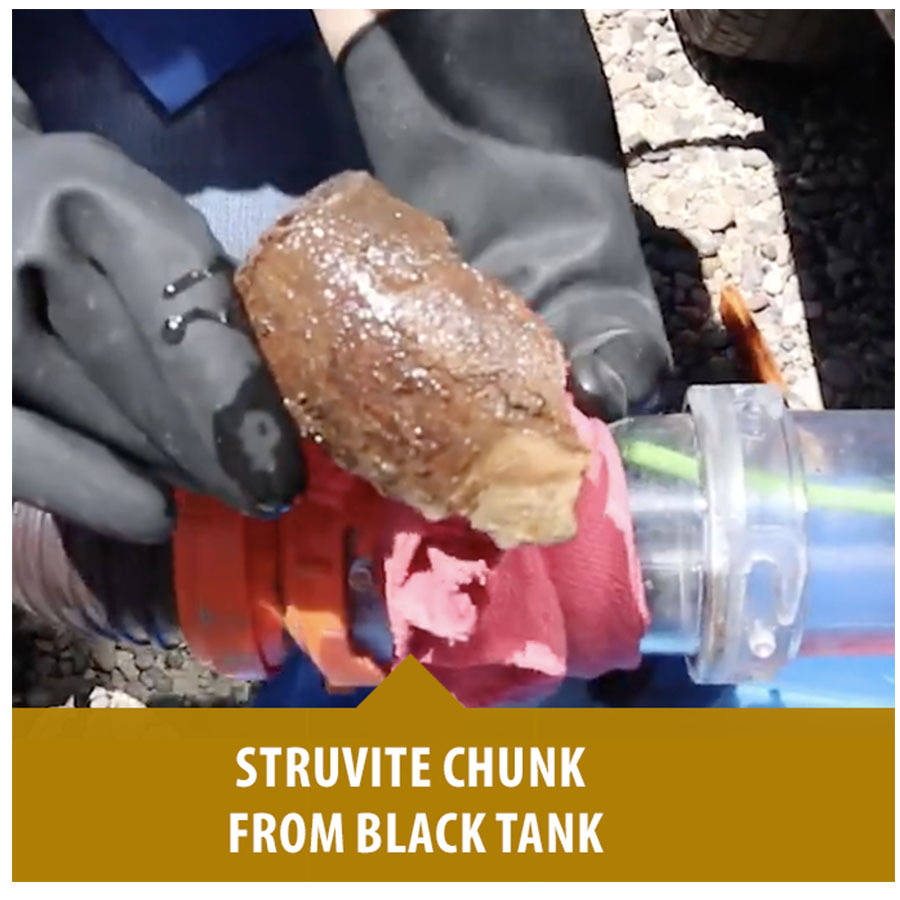
Layers of Buildup Inside Your RV Black Tank (Including Struvite-like Deposits)
People say “poop pyramids,” “compaction,” or “sludge,” but these are different layers with different behavior:
- Organic solids: Waste + paper compact when too little water is used.
- Grease & fats: Common in gray tanks; bind particles and create stubborn films.
- Soap residues: Sticky film that coats walls and sensor probes.
- Biofilm: Slimy layer that traps odor and resists plain water.
- Mineral-locked deposits (struvite-like): Hard deposits that “lock in” other residues and can mimic hard sludge.
Enzymes vs. Buildup-Stripping Cleaners (Why Jar Tests Mislead)
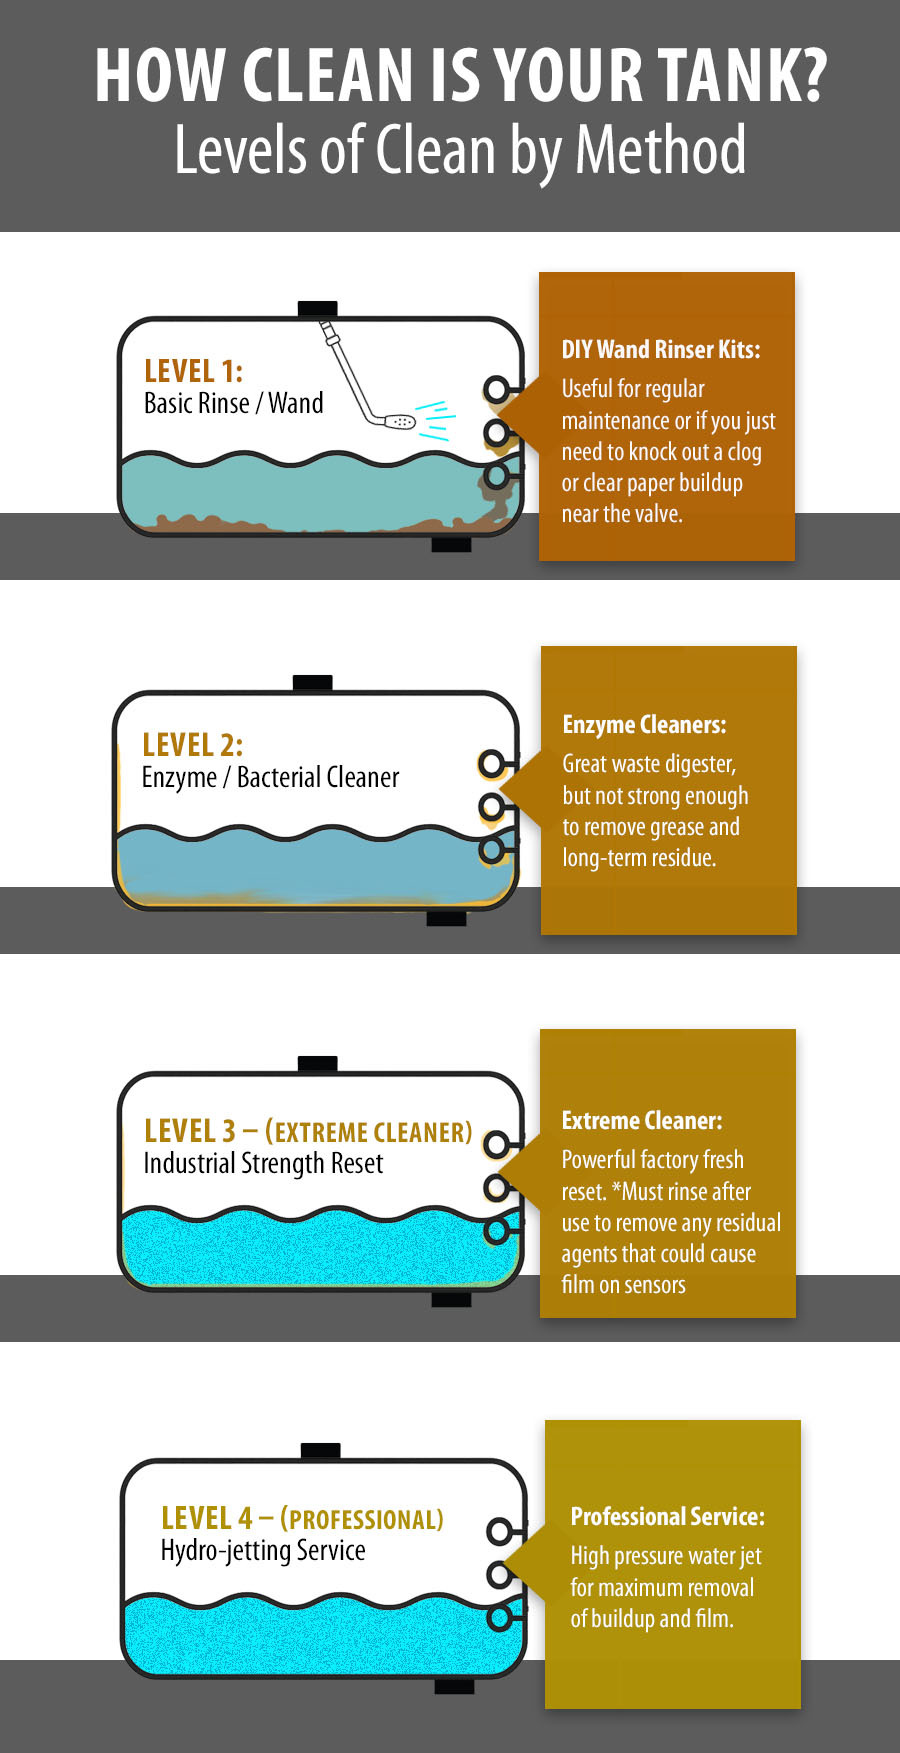
Enzymes can break down organic waste under ideal, well-mixed conditions—but compacted pyramids, sticky films, and mineral-locked layers inside real tanks are different. Buildup-stripping cleaners are layer-removing and grease-cutting: they disrupt greasy binders, soften layered residue, and help lift films so they can be rinsed away.
Note: Extreme Cleaner uses an alkaline-style approach that’s safe for RV waste systems when used as directed.
The Essential Rinse Step for Holding Tanks
After soaking, debris is loosened—but still inside the tank. Rinsing removes it from walls, sensors, and the outlet. Skipping this step is the #1 reason people think “it didn’t work.” Rinse until clear; repeat short cycles if sensors still misread.
Built-In Rinsers vs. Rinse Wands vs. Backflushers (Rhino-style)
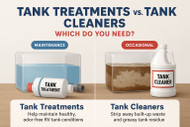
These are rinse tools. They help move loosened debris after a soak and speed up “clear water” results. None are chemical strippers.
Built-In Tank Rinsers
Good coverage; not precision. Best after a soak.
Rinse Wand
Aim around corners and sensor probes post-soak.
Backflusher (Rhino-style)
Reverse-flow agitation near the outlet after a soak.
- Soak first to loosen layers.
- Use a backflusher to move loosened debris out, then finish with a built-in rinser or wand until water runs clear.
- Repeat short rinse cycles if sensors still misread.
What to Really Expect from a Holding Tank Reset
A reset strips sludge, grease, and films from tank walls and probes so you can get back to a clean baseline.
Clean tank, sensors still misread?
Thin films may need another rinse. Do 1–2 extra fill-to-½–¾ and drain cycles.
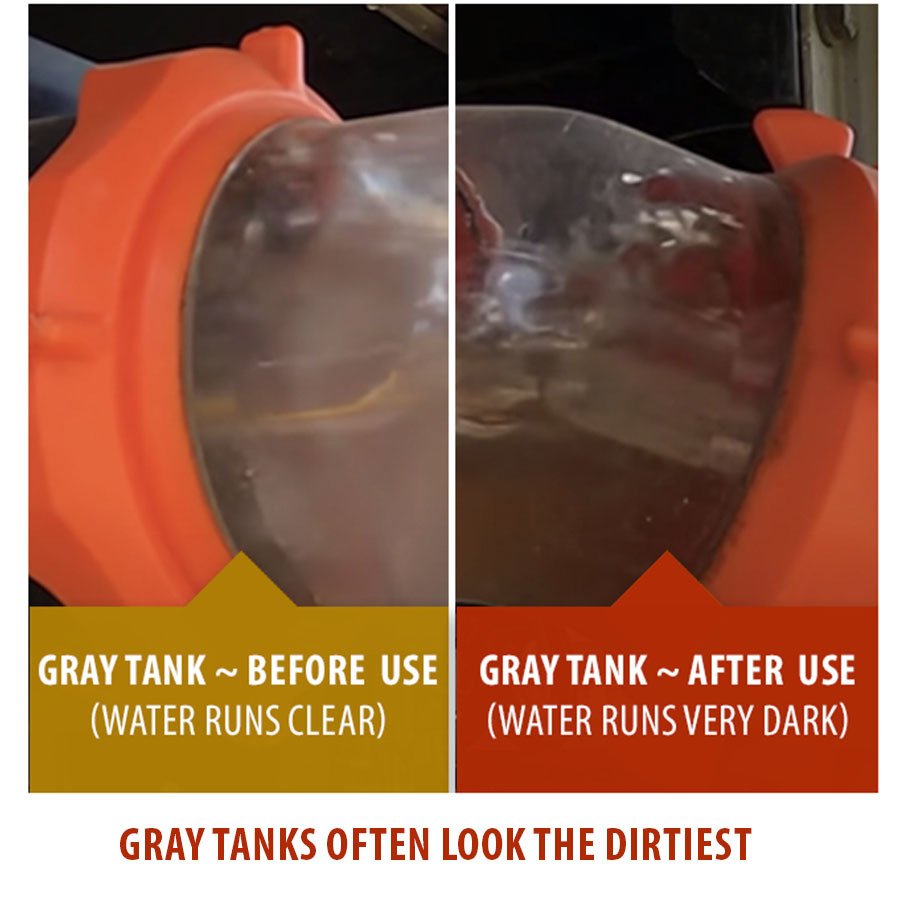
Gray tanks often flush darker
Grease + soap film are the culprits—darker water is normal post-reset.
Compacted black tanks show chunks
Heavily neglected tanks can release visible debris after a soak + rinse.
One container = one complete reset
Use when buying a used RV, after storage, or when odors/clogs/sensor issues appear.
Video: Changing Lanes Uses Happy Campers Extreme Cleaner (Black & Gray Tanks)
Real Happy Camper Black Tank Reset Results: Before & After Cleaning
Don’t let what you think the water should look like determine effectiveness. Below are realistic outcomes you can expect after emptying, rinsing, then doing a proper soak and rinse with Extreme Cleaner.
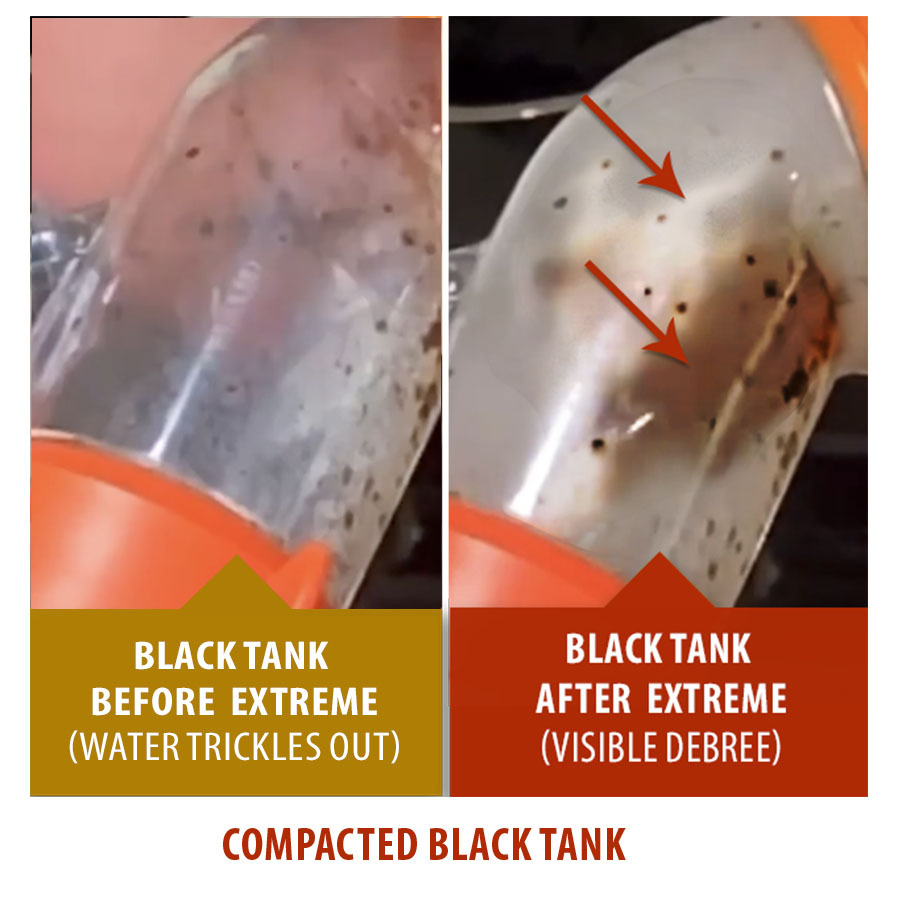
Compacted RV Black Tank Reset
Severely neglected tanks may release visible chunks after a reset — that’s expected. Don’t expect a continuous flow like a routine dump; look for debris clearing and outflow improving.
Combined before/after: compacted black tank outflow clears after soak + rinse.RV Gray Tank Reset
Expect darker water from gray tanks — grease and soap scum are the culprits. After using Extreme Cleaner, you’ll often see significantly darker outflow as films release, followed by clearer water.
Combined before/after: gray tank grease/soap film removed; outflow lightens.RV Black Tank Sensor Cleaning
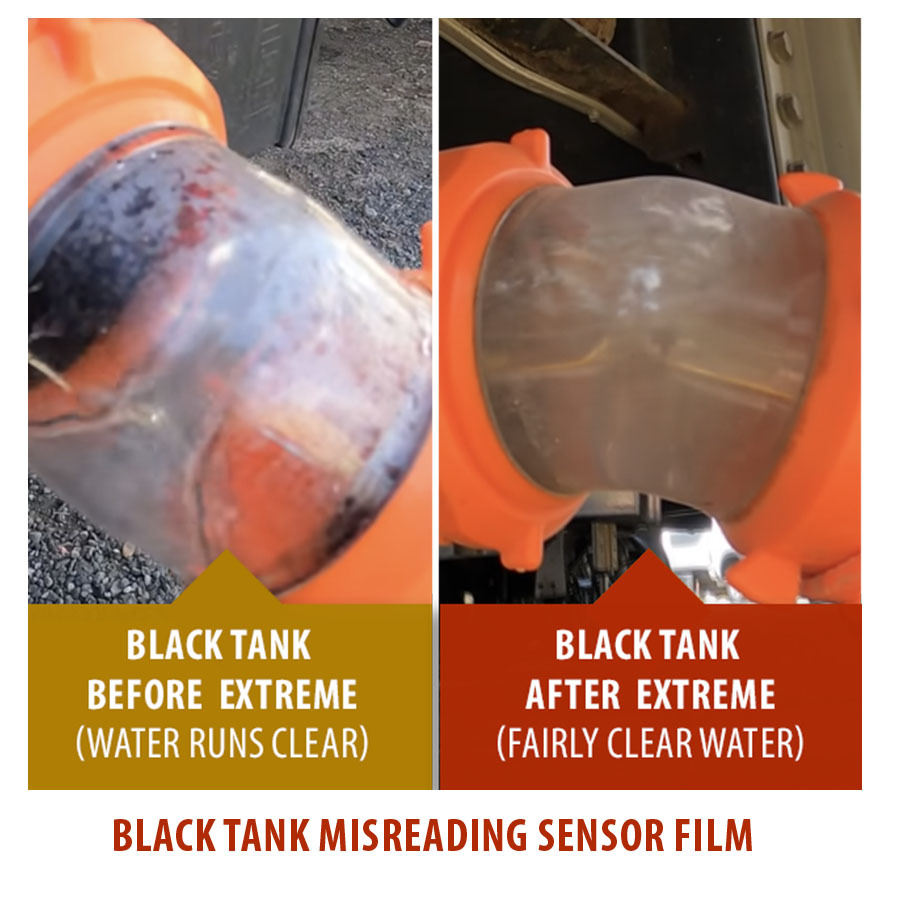
Film on probes can persist after the first dump — extra rinses usually clear it. If probes misread, do one or two short fill-and-drain rinse cycles.
Combined before/after: sensor probes cleared after soak + multiple rinse cycles.Watch: RV Tank Reset (Quick Overview)
Tip: Use this video as the overview, then follow the step-by-step instructions below for soak time, agitation, and rinsing details.
How to Perform a Black Tank Reset with Extreme Cleaner
- Start with an empty tank. Close the valve.
- Add 1 container per tank via toilet (black) or drain (gray), then add warm water until the tank is ½–¾ full.
- Drive or let it sit/soak for a few hours (overnight ideal) to contact walls and probes.
- Dump and flush with fresh water until clear. Repeat rinse if needed.
- Resume your regular holding-tank treatment for prevention.
Best Practices for a Total RV Tank Reset
Light residue / routine reset
Soak: 2–4 hrs • Rinse until clear
Moderate buildup / sensors
Soak: overnight • Rinse + 1 extra fill-and-dump
Compacted / “pyramid” suspected
Soak: overnight • Rinse + 2 extra fill-and-dump cycles
Gray tank heavy film
Soak: 4–8 hrs • Expect darker water; rinse thoroughly
Why RV Tank Sensors Aren’t a Perfect Measurement for a Clean Tank
Tank sensors are fickle. Even after pro hydro-jetting, success is high but not 100%. Thin films can persist; issues can be electrical/mechanical. Judge success by odor-free operation, proper draining, and free-flowing outflow—not just lights.
Watch the Water (Before & After the Reset)
Before adding Extreme Cleaner, run a short freshwater rinse and watch the outflow (a clear elbow helps). That’s your baseline.
After the soak/agitation, rinse again while watching closely. It’s normal for the first post-reset rinse to look darker as loosened layers wash out, then trend clear.
- Gray tank note: tan/brown haze usually indicates grease/soap film releasing.
- If sensors still misread after clear outflow: do one more ½-tank fill, slosh, drain, rinse.
For ongoing upkeep after the reset, return to your mineral-based maintenance treatment.
Reset + Maintain: A Clearer Path Forward
- Strips residue that causes false sensor readings
- Eliminates odors at the source (not masking)
- One container ≈ one reset (DIY)
- After a reset, resume routine treatment to keep tanks clean
Ready to Reset Your RV Tanks?
Restore flow, accuracy, and freshness with a single soak. One container = one complete reset.
Shop Happy Campers Extreme CleanerFAQs — Deep Cleaning Your RV Black Tank
How often should you deep clean your RV black tank?
Perform a full reset once or twice a year, or whenever sensors fail, odors persist, or flow slows down. Regular Happy Campers treatment helps prevent buildup between resets.
Can I use Extreme Cleaner in gray tanks?
Yes — it safely removes grease, soap scum, and food residue using the same soak and rinse method.
Is this method safe for RV plumbing and seals?
Yes. Happy Campers Extreme Cleaner is formulated specifically for RV waste systems when used as directed.


