What to Do When the Campground Sewer Hookup Is Higher Than Your RV Outlet (Uphill Sewer Hose Fixes)
Posted by Happy Campers Store on Aug 26th 2025
What to Do When the Campground Sewer Hookup Is Higher Than Your RV Outlet (Uphill Sewer Hose Fixes)
If the campground sewer hookup is higher than your RV outlet, gravity won’t drain your tanks correctly — here’s how to fix uphill sewer hose problems fast.
TL;DR – How to Fix a High Campground Sewer Hookup
If the campground’s sewer connection sits higher than your RV outlet, gravity can’t drain waste. Create a continuous downhill slope using hose supports, vinyl gutters, or leveling blocks. Keep the hose short, dump tanks at about ⅔ full, and if gravity still won’t work, use a macerator pump to push waste uphill.
- ✅ Raise the hose gradually to eliminate uphill sections
- ✅ Dump at ⅔ full for a strong gravity flush
- ✅ Rinse with gray water afterward to clear residue
Use hose support ramps or DIY vinyl gutter troughs to form a smooth, downhill slope from your RV outlet to the sewer inlet. If gravity still fails, use a macerator pump to push waste uphill through a smaller hose. Always finish by flushing with gray water.
Sometimes the park’s sewer inlet sits higher than your RV outlet — or the ground dips and your hose ends up with uphill sections. Gravity flow stalls, liquids pool, and solids get stuck in the hose. Here’s how to fix the slope safely and keep everything moving. Ultimately you want to create a stair-step setup using 2×4s or leveling blocks: highest under the RV outlet, then one block lower every 1–2 ft until you reach the inlet to keep gravity working.
Safety & Setup Checklist
- Nitrile gloves and paper towels.
- Sealed connection at the sewer inlet (rubber “donut” or threaded adapter), cap on when not connected.
- Backflow-preventing clear elbow or adapter at the RV outlet (helps you see flow and rinsing progress).
- Dedicated potable vs. non-potable hoses (never mix).
Why Slope Matters (and the Target to Aim For)
Waste moves best with a steady, gentle downhill — about 1–2% grade (≈ 1/8–1/4 inch per foot). Big dips create traps, and uphill segments stall flow. Your goal is a smooth, supported run with no low spots or climbs.
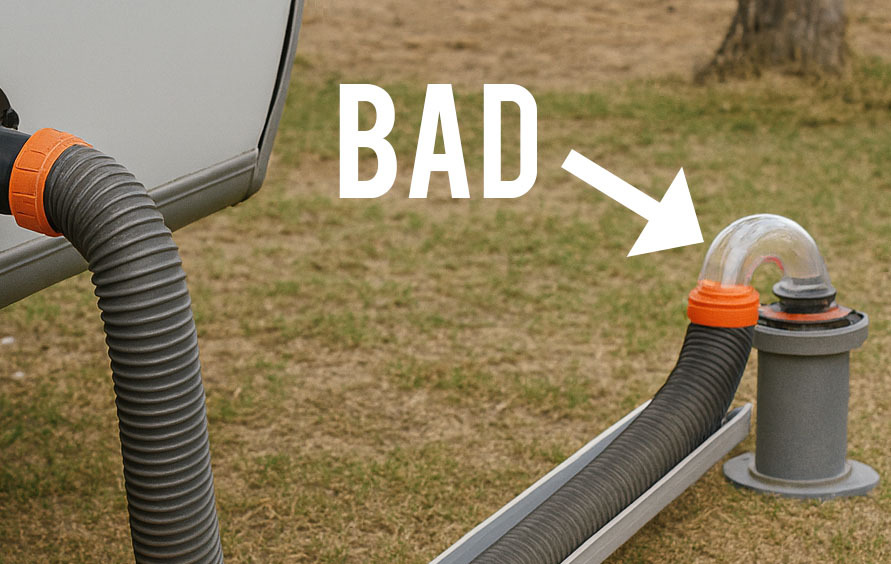
Hated RV Sewer Hose Connection at Campground - Bad vs Good Hose Slope
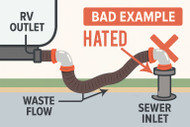
❌ Bad: RV outlet → hose dips → uphill rise to sewer inlet (waste pools, clogs).
✅ Good: RV outlet → supported, gradual downhill to sewer inlet (continuous flow).
Comparison of Slope Fixes
Prices are typical ranges and vary by brand, length, and materials.
Did You Know?
Incorrectly setting up your sewer hose can do more than just slow down dumping — it can actually cause waste to pool in your tanks and leave behind residue that leads to clogs, odors, and inaccurate sensor readings. A poor slope means solids aren’t fully flushed out, which can turn into hardened layers that need a tank reset.
Learn how to prevent this with proper cleaning and treatment: Best Way to Clean an RV Waste Tank (Treatments vs Cleaners) .
Real-World Fixes for Elevated Sewer Hookups
1) Shorten & Support the Hose Run
- Use the shortest hose length that reaches comfortably — coil or remove extra sections.
- Keep fittings high and the hose supported to prevent sags.
- Use a clear elbow at the outlet to monitor flow and rinsing.
Need a complete setup? See our guide on The Best RV Sewer Hose Kits (Length, Durability & Ease of Use) .
PRO TIP: Don’t leave the black valve open while camping. Keep it closed so liquids suspend solids, then dump at ~⅔ full for strong scouring flow.
2) Commercial Hose Support Ramps (Adjustable Slinkies)
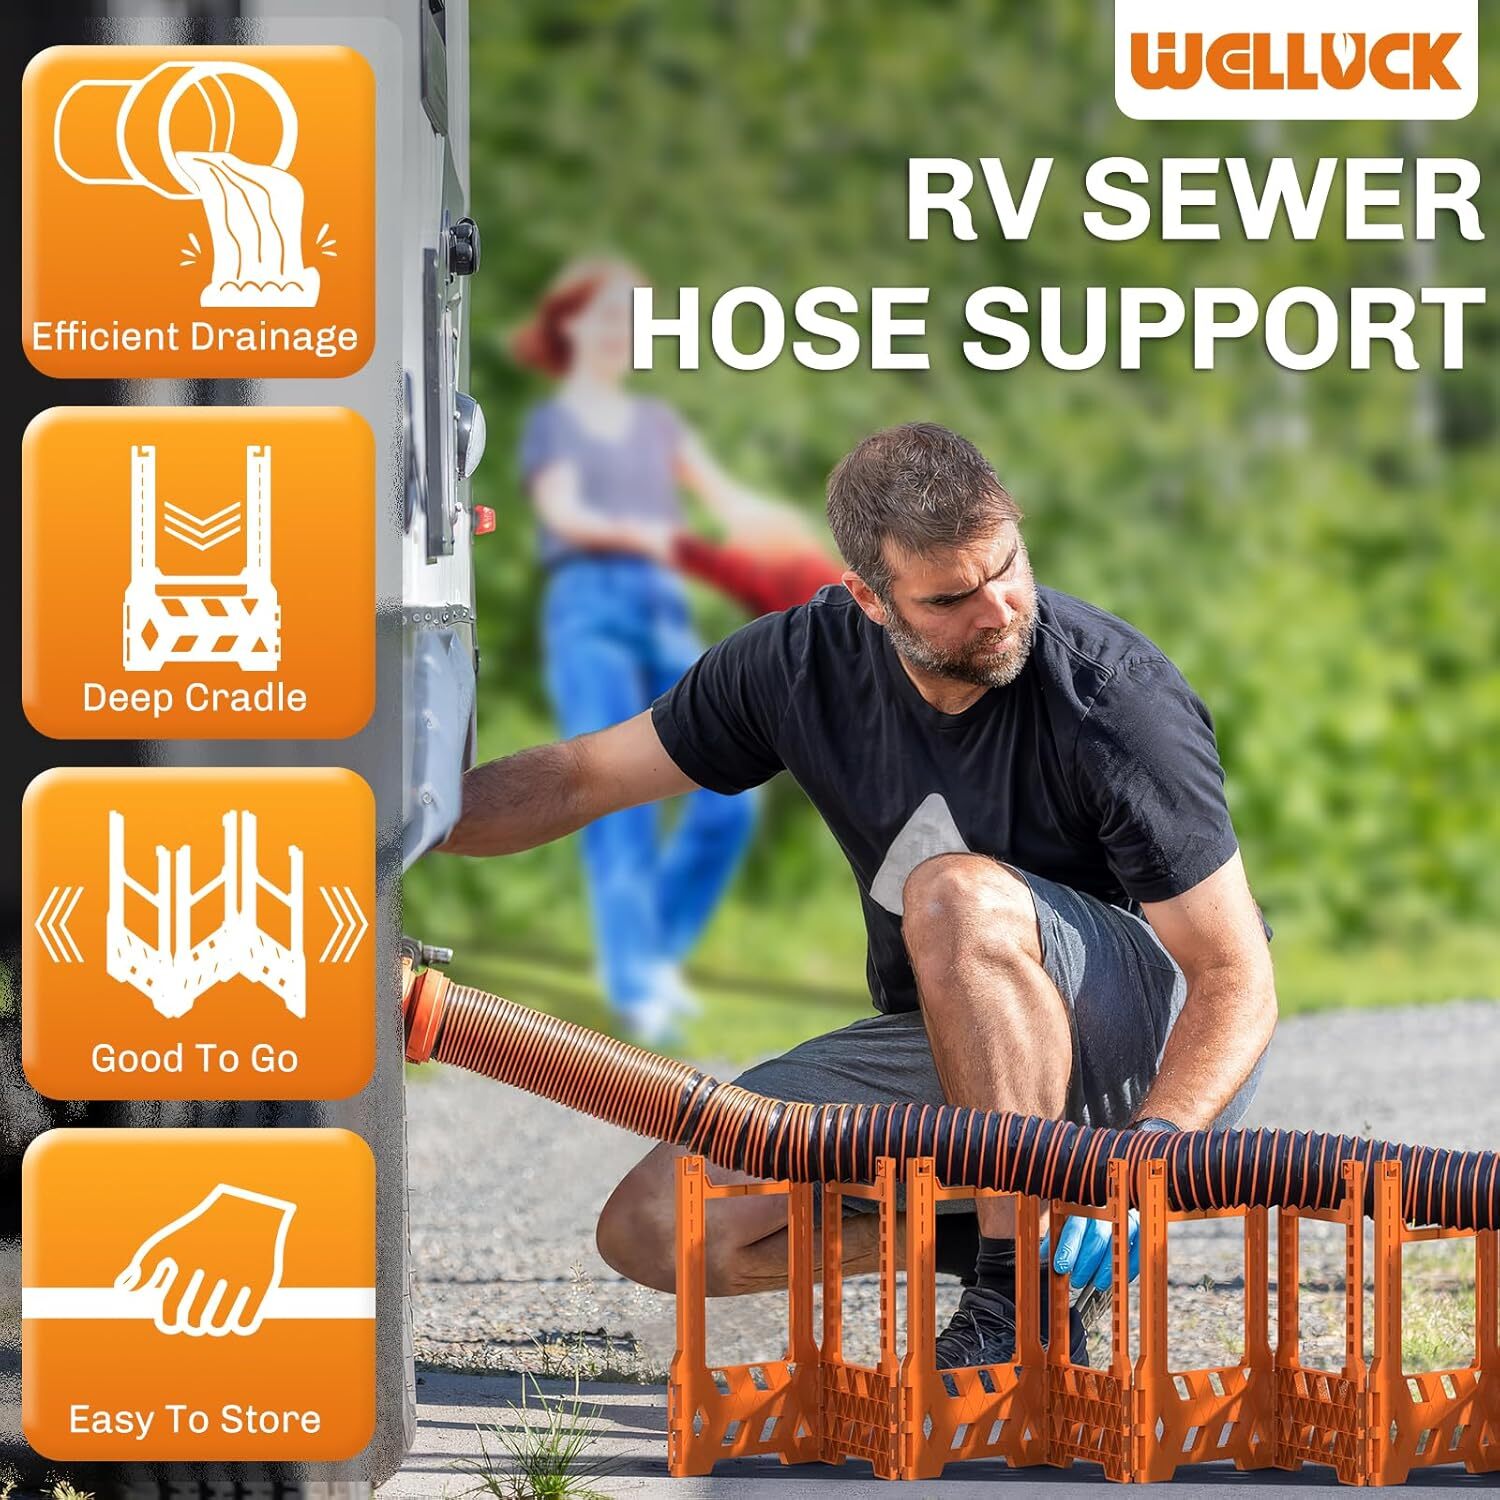
One of the most reliable solutions for keeping a proper slope is a commercial hose support ramp. These are lightweight, accordion-style supports that cradle your sewer hose and step it down toward the sewer inlet — creating the continuous slope that gravity demands.
Why They Work
- Adjustable slope: The accordion design lets you raise or lower sections to keep the hose running downhill.
- Secure cradle: The deep U-shaped channel holds the hose steady, preventing roll-offs.
- Visibility & safety: Bright color reduces trip hazards and reminds you not to leave it behind.
- Compact storage: Folds down into a carry bag, making it easy to stash in storage bays.
PRO TIP: Start the ramp high under the RV outlet and step it down evenly toward the sewer inlet. If the ground is uneven, use leveling blocks under the supports to fine-tune the slope.
Want more details? Check out our in-depth review: The Best RV Sewer Hose Supports (Based on Customer Reviews & Ease of Use) .
How to Set It Up
- Place the first ramp segment directly under your RV’s sewer outlet connection.
- Extend the support like an accordion, following the path to the sewer inlet.
- Adjust height step-by-step until the hose runs continuously downhill with no dips or rises.
- Secure the hose in place with rubber bands or Velcro straps (if provided).
- Double-check: no uphill segments, no sagging “bellies,” and a clear slope into the inlet.
DIY vs Commercial: Vinyl rain gutters and PVC half-pipes work in a pinch, but commercial supports like WELLUCK are faster to set up, easier to store, and provide more consistent slope. Think of them as the “set it and forget it” option compared to DIY balancing acts.
RVer Feedback
- ⭐️⭐️⭐️⭐️⭐️ — “Makes dumping simple. No more fighting with uphill connections.”
- ⭐️⭐️⭐️⭐️ — “Folds up small and the orange color makes it easy to spot.”
- ⭐️⭐️⭐️⭐️⭐️ — “I used to struggle with homemade supports. This was worth every penny.”
Ready for stress-free dumping? Pair a hose support ramp with Happy Campers Holding Tank Treatment to keep your tanks odor-free and flowing smoothly — no matter how the campground hookup is positioned.
3) DIY Vinyl Rain Gutter Trough (Cheap & Effective)
A 10-ft vinyl rain gutter section (plus end caps) makes a rigid trough that prevents sags and creates an easy, continuous slope. Elevate one end with blocks and let it gently descend to the sewer inlet.
- Cut the gutter to length; deburr edges.
- Rest the hose inside the gutter; use rubber bungees or Velcro if windy.
- Support the gutter every 2–3 ft with leveling blocks, bricks, or scrap wood, stepping down toward the sewer.
- For corners, use two shorter sections with a small overlap and support the junction.
Quick Note: Vinyl gutters are light, inexpensive, and nest together for storage. Add inexpensive end caps to keep critters or debris out between stays.
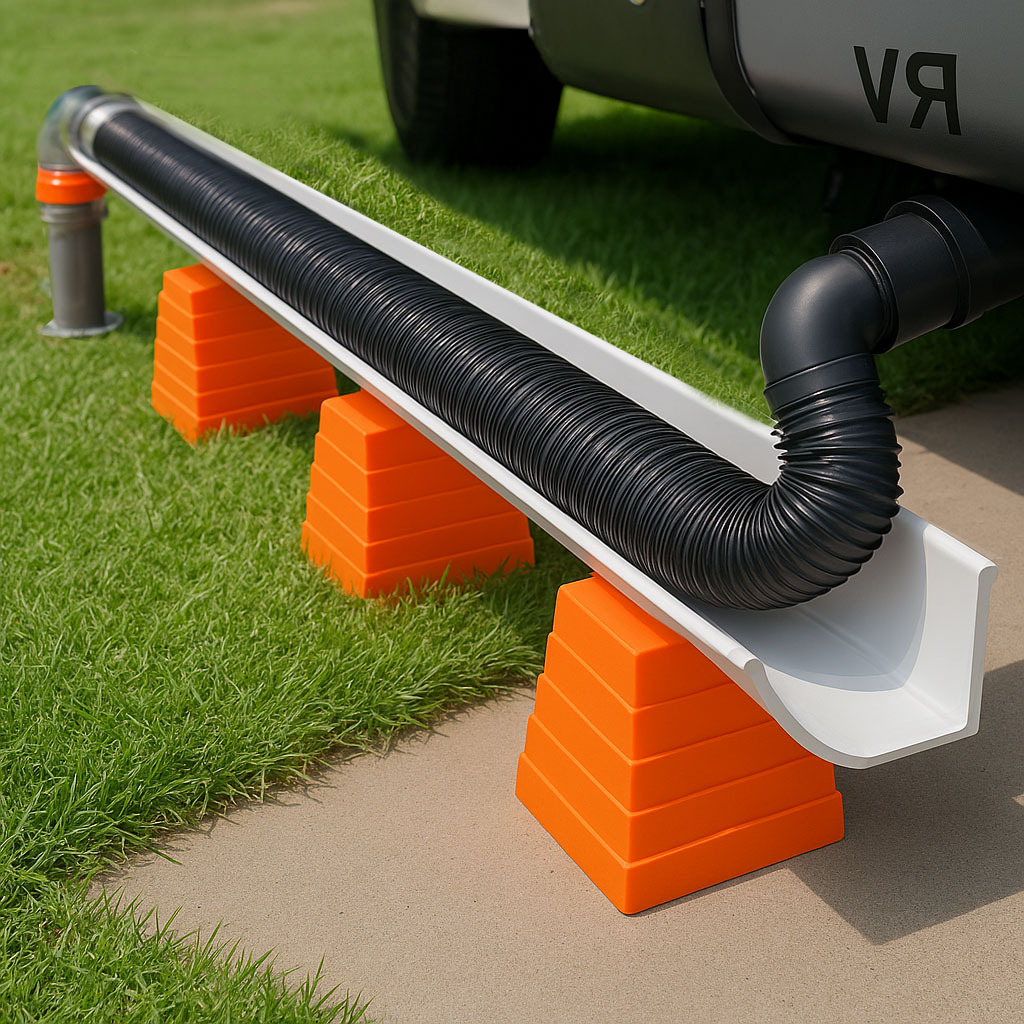 Vinyl Gutter Trough
Hose sits inside a straight gutter; blocks create a gentle step-down; continuous downhill path.
4) DIY PVC “Cradle” or Half-Pipe
Split 3–4" PVC into half-pipe (or use large PVC with notched saddles every 2–3 ft). The hose rides in the channel while you support sections on blocks for a controlled slope.
- Cut 18–24" cradles; sand edges smooth.
- Set each cradle on a block, stepping down toward the sewer.
- Zip-tie cradles to a lightweight strip (optional) for quick setup.
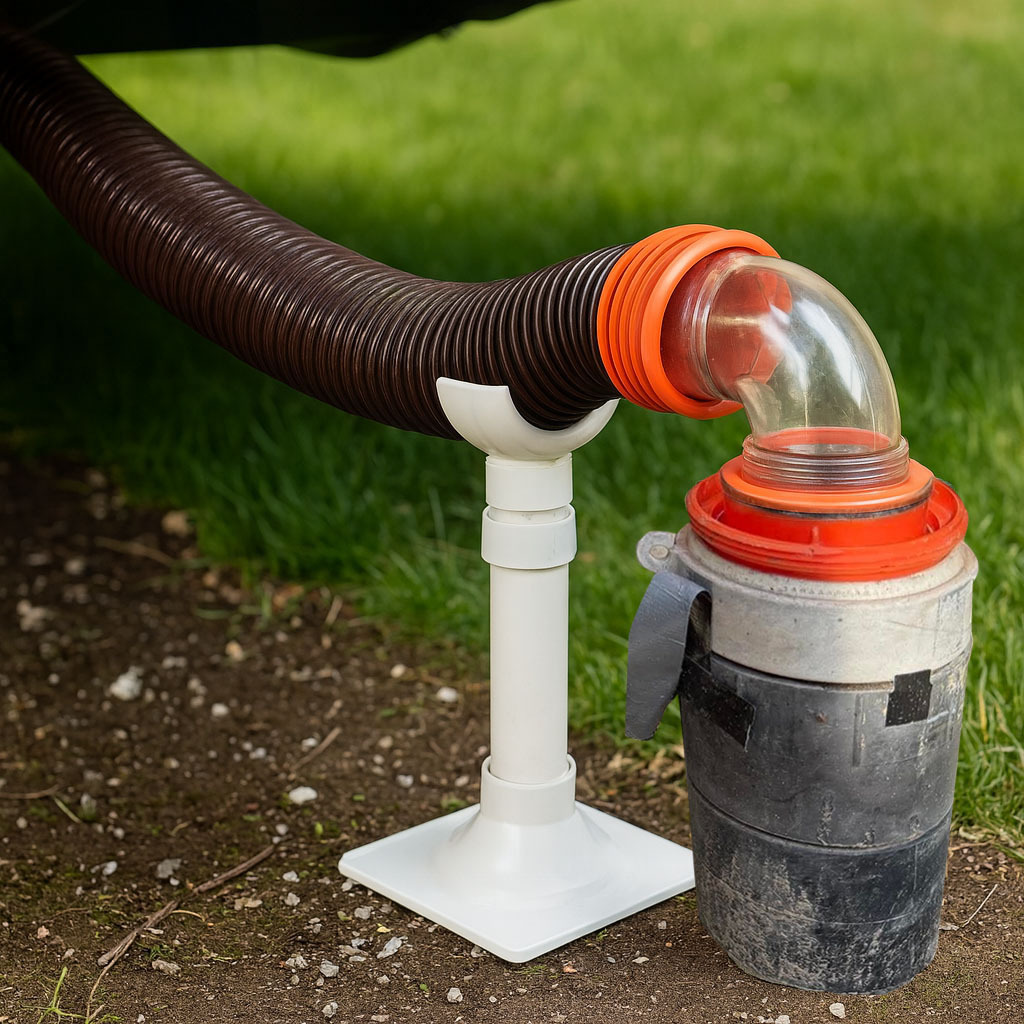 DIY PVC Props and Troughs
Hose sits inside straight or elbow half-cut PVC strips; use PVC connectors to create gentle step-downs; continuous downhill path.
5) Step-Down Elevation Fix with Blocks
If the sewer inlet is just a bit higher, build a simple stair-step: stack leveling blocks or 2×4s under the hose run so it starts high at the RV outlet and drops one “step” every 1–2 ft until it reaches the inlet.
- Use more steps near the inlet to maintain a steady slope.
- Combine with a vinyl gutter or PVC cradles to prevent sags between steps.
- Re-check after rain or foot traffic — blocks can settle.
6) Last Resort: Macerator Pump to Push Uphill
When gravity simply won’t cooperate, a macerator pump at the RV outlet can grind and pump waste through a garden hose uphill to the sewer connection (check park rules first).
- Use a dedicated, labeled discharge hose (non-potable only).
- Keep discharge hose lengths reasonable; avoid tight kinks or coils.
- Rinse and sanitize the system thoroughly after use.
PRO TIP: Always finish by opening the gray valve for 20–30 seconds to rinse the sewer hose with soapy sink/shower water before disconnecting.
Best-Practice Dump Routine (Keeps Things Moving)
- Verify a sealed sewer inlet connection (donut or threads); support the hose with a downhill slope.
- Open black valve first; watch flow via the clear elbow.
- Close black; use tank flush (or backflush elbow) until water runs mostly clear.
- Open gray valve to rinse hose.
- Disconnect, cap, and stow; keep fittings clean and dry.
Keep odors down while you perfect the slope: add Happy Campers Holding Tank Treatment after each dump. For stubborn odor or sensor issues, do a full reset with Happy Campers Extreme Cleaner.
Done dumping? Don’t miss our roundup of The Best RV Sewer Hose Storage Ideas for clean, clever storage solutions.
Why Your RV Black Tank Won’t Drain at Certain Campsites
If your tank won’t drain even when valves are open, the sewer inlet is likely higher than your RV outlet or the hose has a sag creating an airlock. Level the rig, shorten the hose, and elevate the run using supports or a step-down ramp to restore continuous downhill flow.
Best RV Macerator Pumps for Uphill or High Sewer Hookups
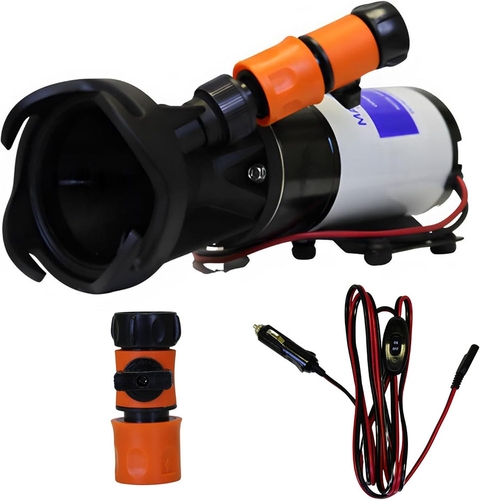
When gravity just won’t do the job — like at campsites where the sewer hookup sits higher than your RV outlet — a macerator pump can grind and push waste uphill through a standard garden hose. These 12V units connect directly to your RV’s drain outlet and make dumping at awkward angles clean and controlled.
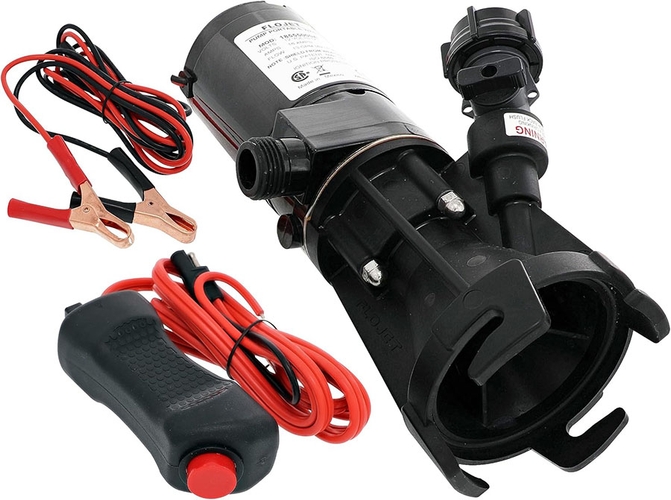
Flojet 18555-000A Portable RV Waste Pump
Reliable 12V macerator pump with garden hose discharge. Pumps waste uphill up to 50 feet.
? Pro Tip: Always finish by running gray water through your macerator system to rinse it clean — then add Happy Campers Treatment to keep tanks odor-free and residue-free.
FAQ: How to Fix Flow When Campground Sewer Inlet Is Higher Than Hose?
Q: How do I keep flow when the campground sewer inlet is higher?
Create a continuous downhill slope using adjustable hose support ramps or shims. Keep the hose short, remove sags, and step supports down toward the inlet.
Q: What slope should I aim for?
About 1–2% grade (≈ 1/8–1/4 inch per foot). Avoid dips and any uphill segments.
Q: Can I use a vinyl rain gutter as a trough?
Yes. A 10-ft vinyl gutter with end caps makes a rigid DIY trough. Support it on blocks every 2–3 ft to form a gentle step-down slope.
Q: What’s a U-shaped PVC support?
DIY cradles made from 3–4″ PVC cut into half-pipe sections. Place on blocks every 2–3 ft, stepping down toward the inlet.
Q: Should I leave the black valve open?
No. Keep it closed so liquids suspend solids. Dump at ~⅔ full, then rinse with gray water to clean the hose.
Q: Gravity still won’t work — now what?
Use a macerator pump at the outlet to push uphill through a hose (park rules permitting). Rinse thoroughly afterward.
Related Reading


