
")
RV Slide-Out Not Working: Electrical vs Mechanical Diagnosis (How to Tell Fast)
Posted by Happy Campers Store on Jan 9th 2026
RV Slide-Out Not Working: Electrical vs Mechanical Diagnosis (How to Tell Fast)
If your RV slide won’t move, this guide helps you determine whether the problem is electrical (common and inexpensive) or mechanical (less common and more serious) — before you cause further damage.
Quick “Do This First” Checklist (60 Seconds)
- Stop pressing the switch if there’s no movement after ~5–10 seconds.
- Confirm battery disconnect is ON (some RVs have a cutoff switch that kills slide power).
- Confirm parking brake (or transmission in Park) if your RV has slide interlocks.
- Look outside/inside for obstructions (branches, toppers jammed, cabinet doors, loose rugs).
- If you hear clicking or dimming lights, go straight to voltage under load (Step 1).
First Rule: Don’t Force the Slide
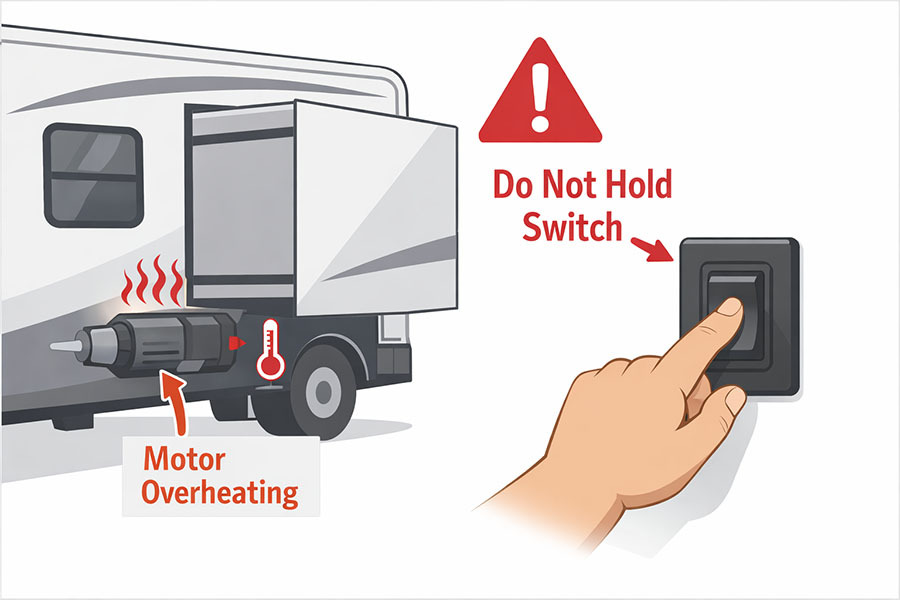
When a slide-out stalls, holding the switch longer does not help. It usually causes additional damage:
- Overheats and burns slide motors
- Trips breakers repeatedly (weakening them over time)
- Strips gears / damages racks / shears pins
- Twists the slide frame and accelerates seal wear
The goal is to find out whether the issue is electrical (most common) or mechanical (higher risk).
Fast Diagnosis: Electrical or Mechanical?

| Symptom | Most Likely Cause | What It Usually Means |
|---|---|---|
| Nothing happens (no sound) | Interlock, fuse, switch, power cutoff | The slide isn’t getting command power or supply power |
| Clicking but no movement | Low voltage / breaker cycling | Control is trying; motor can’t get enough power |
| Moves a little, then stops | Voltage sag or binding | Power is marginal or the slide is dragging |
| Lights dim hard when switch is pressed | High current draw + weak batteries/cables | Classic electrical supply problem |
| One side moves more than the other | Mechanical misalignment | Stop immediately; damage risk increases fast |
| Grinding, popping, clunking | Mechanical issue (gear/rail/arm) | Do not force; plan inspection/repair |
Step 1: Check Battery Voltage (Most Common Cause)
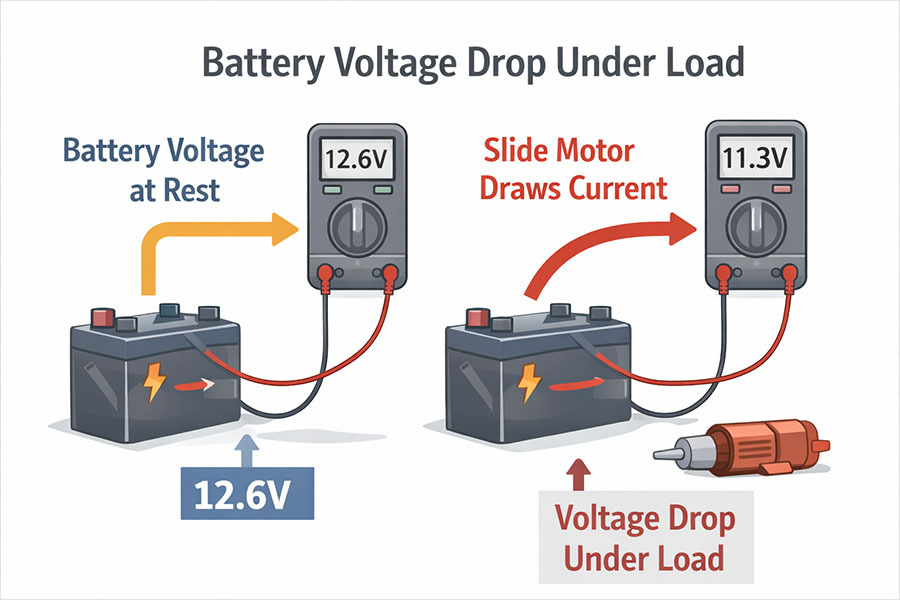
Slide-outs draw a lot of current. A battery can read “okay” at rest and still fail the moment the slide motor loads it.
- Resting voltage (no load): about 12.6V is fully charged for lead-acid.
- Under load (while pressing slide switch): try to stay above about 11.5V.
Do the “Voltage Drop” Test the Right Way
For best accuracy, measure as close to the motor circuit as you can:
- Measure at the battery posts (not the cable ends) while someone taps the slide switch.
- If possible, also measure at the slide motor feed (or slide control/breaker) while attempting movement.
If you see a big difference between battery voltage and the motor feed, you likely have:
Poor grounding doesn’t just affect performance — it can be dangerous. This article explains how bad grounds can lead to RV grounding and hot skin electrical hazards, especially when high-current devices like slides are operating.
- Loose/corroded cable lugs
- Weak/overheated auto-reset breaker
- Undersized wiring or failing connections
Also inspect ground connections. A corroded ground can mimic a dead battery because the motor can’t complete the circuit.
Cold Weather Warning
In cold weather, battery output drops and slide grease thickens. Slides that work fine in summer can stall in freezing temps because the motor needs more current at the exact moment batteries deliver less.
Step 2: Shore Power Does NOT Guarantee Slide Power

Most RV slide-outs still run on 12V DC. Shore power helps only if the converter is charging correctly and the batteries/cabling can deliver high current.
- Weak converter output = weak slide movement
- Batteries buffer the current surge when the motor starts
- Converter issues often show up first when you run heavy 12V loads (like slides)
If your slide works better on a generator or right after charging, the issue may be converter-related. This guide explains how to diagnose and decide between DIY or professional help for RV converter replacement and charging problems.
Step 3: Inspect Fuses, Breakers, and the Slide Switch
Before assuming major repairs, check the common “no power” and “partial power” failure points:
- Inline fuses near the battery (some rigs have dedicated slide fuses)
- Auto-reset breakers on the frame (these can get weak and trip early)
- Battery disconnect switch (can cut power to slide circuits)
- Slide switch (a failing switch can pass partial voltage)
If Nothing Happens at All
If the slide does absolutely nothing (no click, no hum), prioritize:
- Interlocks (next section)
- Power cutoff / battery disconnect
- Blown fuse or a tripped/failed breaker
- Bad switch or control module issue
Slides are just one part of your 12-volt system. If you’re seeing multiple electrical symptoms, start with a full RV electrical system troubleshooting guide to identify root causes instead of chasing symptoms.
Step 4: Check Safety Interlocks (Common “No-Response” Cause)
Many RVs prevent slide movement unless certain conditions are met. This varies by brand and model, but common interlocks include:
- Parking brake set (or transmission in Park)
- Ignition OFF (some rigs lock slides if the key is on)
- Leveling system state (some lock slides during leveling)
- Door/step switches on certain models
If your slide won’t respond at all, check these before you tear into wiring.
Step 5: Look for Drag, Binding, or Obstructions
Electrical issues are most common, but a slide can also stall because it’s physically dragging. Quick checks:
- Look for slide topper fabric jammed or holding debris/ice
- Check seals for ice buildup or sticky contact
- Inside: confirm nothing is blocking movement (cabinet doors, loose rugs, furniture)
- Outside: verify the slide path is clear (posts, rocks, branches)
A dragging slide increases motor current draw and can make an electrical system look “weak” even if batteries are decent.
Know Your Slide Type (This Matters)
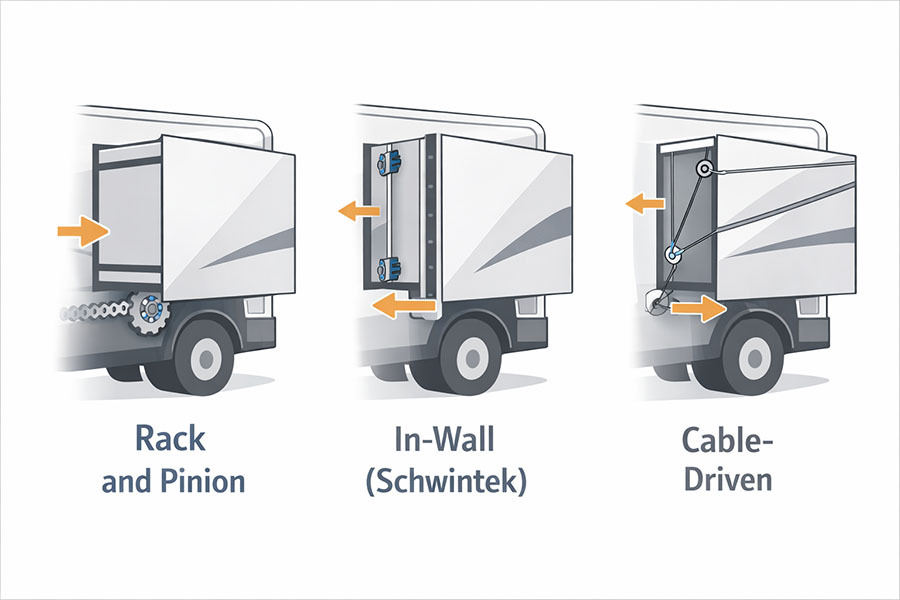
Different slide mechanisms fail differently. Knowing your type narrows diagnosis quickly:
- Rack-and-pinion: robust but can draw heavy current; watch voltage drop.
- Schwintek (in-wall): sensitive to voltage imbalance and alignment; uneven movement is a red flag.
- Cable-driven: can stretch or lose tension; watch for uneven extension.
- Hydraulic slides: may fail due to pump power, fluid issues, or valve problems (still often electrical at the pump).
Signs of a True Mechanical Failure
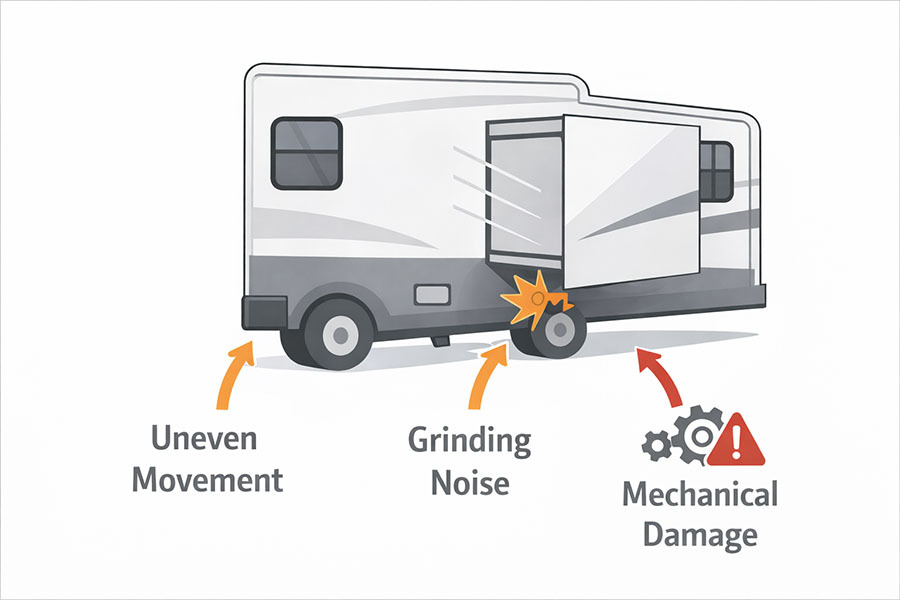
Mechanical failures are less common, but they’re higher risk. Stop immediately if you see:
- Uneven extension/retraction (one side moving more)
- Grinding, popping, clunking noises
- Visible sagging or a crooked slide
- Failure right after impact (hitting something, binding on a curb)
Common mechanical causes include stripped gears, bent rails, broken brackets, sheared pins, or debris in the track.
What NOT to Do (This Prevents Major Damage)
- Do not hold the slide switch longer than ~10 seconds if it stalls.
- Do not push or pull the slide by hand (can twist the frame and damage seals).
- Do not “machine-gun” the switch (repeated starts overheat motors and breakers).
- Do not assume shore power means “unlimited slide power.”
Emergency: How to Retract a Slide Manually
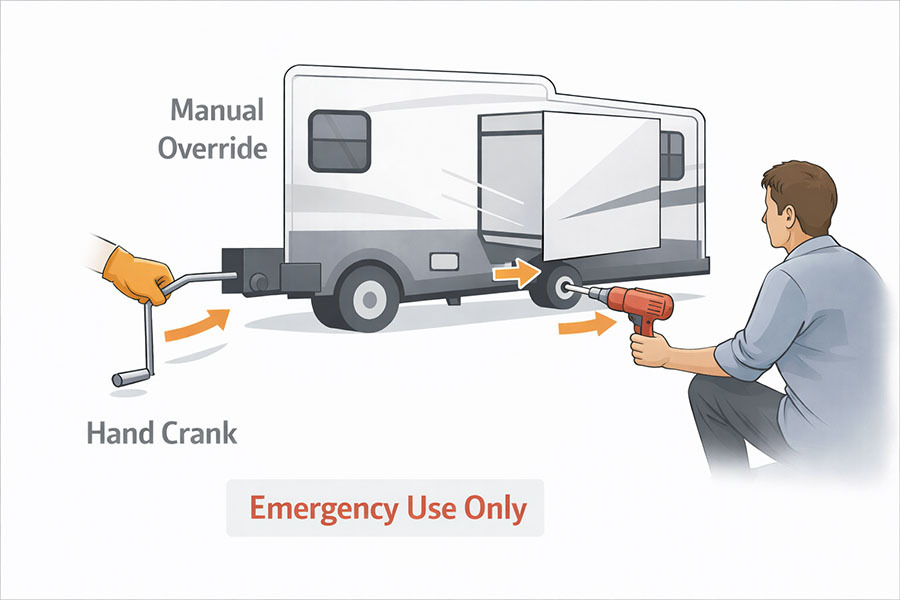
If you must move the RV, many slide systems offer a manual override (crank-in or drill assist). The exact procedure varies by manufacturer and model.
When to Call a Professional
- The slide is visibly crooked, binding, or sagging
- You hear grinding or metal popping
- Electrical tests pass but movement is still uneven
- The slide will not manually retract
- You suspect hydraulic valve/pump issues and are not equipped to diagnose safely
Final Takeaway
- Most slide-out problems are electrical (low voltage, weak connections, breakers, batteries).
- Voltage under load matters more than resting voltage.
- Ground connections are part of the circuit — treat them as a primary suspect.
- Mechanical failures have clear warning signs: noise, uneven movement, visible misalignment.
Diagnose calmly and methodically, and you’ll often avoid a major repair bill.