How to Dump & Flush Your RV Black Tank (Step-by-Step Guide)
Posted by Happy Campers Store on Jul 7th 2025
How to Dump & Flush Your RV Black Tank (Step-by-Step Guide)
Dumping your RV black tank feels messy—but done correctly, it’s quick and keeps your tank functioning smoothly. This guide walks you through the safest, most effective process to dump and flush your black tank with minimal hassle.
When to Dump Your Black Tank
Dump when the tank is about two-thirds full or every 3–5 days during active use. That ensures enough liquid flow to carry solids out (and avoids “pyramiding”). For the big picture, start with our RV Black Tank 101 pillar guide.
Where You Can (and Should) Dump Your RV Tanks
We get this question a lot: “Can I just dump my tanks on my property?” The answer is usually no — or at least, it depends on your setup and local regulations. Each state has different rules for RV black and gray water disposal. Here’s what you need to know:
- Campground Dump Stations: The easiest, safest option. Most RV parks and campgrounds have a dump station you can use — sometimes for a small fee if you’re not a guest.
- Approved RV Waste Sites: Many highway rest areas, travel centers, and municipal waste facilities offer RV dump stations. Use resources like rvdumps.com to find one nearby.
- Your Own Septic System: If your home is on a septic system and you have a cleanout port, you can legally dump there — just make sure to avoid spilling and never overload the system (space dumps out over time if needed).
- Municipal Sewer Hookup: If your property is on city sewer and you have access to the cleanout, you can usually dump legally — but check local ordinances first.
- Never Dump on the Ground: Dumping black or gray water on the ground is illegal almost everywhere and can lead to fines and environmental contamination.
For a deeper dive into cleaning after a proper dump, check out our guide on the best way to clean your RV waste tank — and if you have compacted buildup or bad odors, consider a full tank reset.
Step-by-Step: How to Dump
- Put on gloves.
- Attach your sewer hose securely to the RV outlet and the site connection (use an adapter if needed).
- Confirm a tight, leak-free fit.
- Open the black tank valve fully and let it drain until flow stops.
- Close the valve once empty.
Here’s a helpful YouTube tutorial that shows exactly how to dump your RV black tank step by step. It’s well-explained and easy to follow:
How to Flush Your RV Black Tank
Built-in flush inlet: Connect a dedicated (non-potable) hose to the flush inlet and follow your RV’s manual to rinse tank walls and sensors.
No flush inlet? Use a tank rinser wand through the toilet to spray down the inside walls.
- Rinse in cycles until the water runs clear
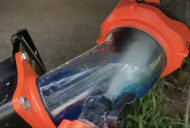
- Use a clear elbow to monitor what’s coming out
- Never use your freshwater/white hose for flushing
Video: How to Properly Dump and Flush Your RV Black Tank
For a visual walkthrough of the black tank dumping process, check out this helpful video from ForestRiverInc on YouTube. They do a great job demonstrating each step safely and effectively.
When a Flush Isn’t Enough: Cleaning vs. Full Reset
A routine flush keeps things moving, but persistent odors, slow outflow, or sensors stuck at 2/3–Full usually mean you need to go beyond rinsing. Use the resources below to pick the right next step:
Choose the Right Cleaning Method
Not sure whether you need a rinse, treatment, deep clean, or something stronger? This guide compares treatments vs. cleaners and shows which level of clean to use for your symptoms.
Best Way to Clean an RV Waste Tank (Treatments vs. Cleaners)
Compacted Tank or Recurring Odor? Do a Full Reset
If you’re seeing brown rinse water after multiple flushes, weak flow, or stuck sensors, you likely have hardened buildup. A full reset strips layers from tank walls and probes.
Quick rule: Try a proper flush first. If odors or bad readings return quickly, follow the cleaning guide above; if symptoms persist or flow is weak, move to the full reset.
? Best Practices to Avoid Odor & Buildup
- After flushing, leave 1–2 gallons of water in the tank.
- Keep the black tank valve closed while hooked up (until you dump).
- Use Happy Campers mineral-based treatment after each dump to liquefy waste and neutralize odor.
- Flush thoroughly every time—especially in hot weather or long stays.
Simplify Every Dump with a Consistent Treatment
Happy Campers works reliably in any climate (no enzyme temperature fuss). Add it after each dump to keep waste liquid and odors down between trips.
Try Happy CampersFAQ
How often should I dump my RV black tank?
When it’s about two-thirds full or every 3–5 days during active use. Avoid daily dumping—solids need liquid volume to exit.
Should I flush after every dump?
Yes. A quick rinse to “clear” prevents residue on walls and sensors and reduces odor.
Should the valve stay open at a full-hookup site?
No. Keep the valve closed so liquids don’t drain away and leave a pyramid of solids.
What’s the best treatment to add after dumping?
A mineral-based treatment like Happy Campers—consistent, temperature-agnostic, and sensor-friendly.
Do I need a deep clean if I flush thoroughly?
Not every time. If odors persist, sensors misread, or you see residue, move up to a periodic deep clean.
When You Need More Than a Flush
Persistent odors, sensor errors, or visible residue? A routine flush may not be enough—move up to a full deep clean. If flow is slow or stopped, use our unclogging guide for fast fixes.


